

Simple Hoodie into a Modern Style

How to Turn a Simple Hoodie into a Modern Style Statemen
Introduction
Simple Hoodie into a Modern Style statemen, The hoodie is one of the most versatile pieces of clothing you can own. It’s warm, comfortable, and stylish—and it comes in a ton of different colors, patterns and fabrics. In fact, there are so many ways to wear it that you could probably have a whole closet full of hoodies without ever wearing two of them the same way! That being said, I think it’s time to elevate your basic hoodie game with some added detail. All you need is some basic sewing skills and some fabric (or other material) that has good drape value to make this easy DIY project really shine.
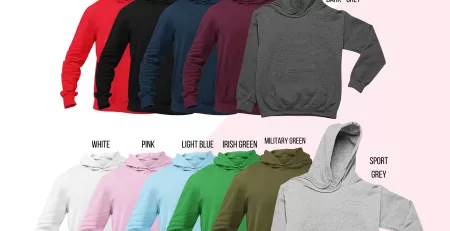
Choose a solid color fabric. – Minimalist Hooded Sweatshirt.
One of the easiest ways to make a simple hoodie into a modern style statement is by choosing a solid color fabric. Solid colors are versatile, easy to work with, and they can give you many different looks.
- They’re easy to work with: because there’s no pattern or print on most solids, it’s easier for you to create your own design and sew your own look. You don’t have to worry about matching up stripes or keeping things straight—just get creative!
- They’re versatile: because there’s no pattern or print on most solids, you can use them in nearly any outfit combination (and even pair them with prints if you want!). You can wear them day-to-day or dress them up for an evening out.
- They’re more casual than prints: since prints tend to be more formal than solids in general society (think about suits versus tuxedo jackets), choosing an everyday piece like this hoodie allows you greater flexibility when choosing clothing choices throughout your day-to-day life—especially if what we said above applies!
Cut out your pattern pieces according to the size you selected.
If you are new to sewing, the first step is to make sure that you are using a pattern designed for your size. Measuring yourself correctly and choosing the right size can be tricky, so it’s best not to skip this step!
- Measure yourself with a tape measure. The results depend on your body type, so it’s important that you take measurements according to these guidelines:
- bust/chest measurement (in inches)
- waist measurement (in inches)
- hip measurement (in inches)
- shoulder width
Trace the pattern pieces on your fabric.
- Trace the pattern pieces on your fabric.
- Use a pencil to trace the pattern pieces onto the wrong side of the fabric (the side you’ll be sewing from). If you have an especially dense weave, it may be helpful to line up each piece with its corresponding cut edge and trace around that instead.
- Do not skip this step! It’s okay if you make a mistake or accidentally draw over something that isn’t supposed to be there; just keep going until all of your pieces are traced.
- When tracing, keep in mind that some fabrics can bleed through other materials (like paper). This is especially true for dark-colored fabrics like denim or corduroy; if this is happening to you and looks messy, try using light-colored pencils instead.
Cut out the traced pattern pieces.
Cut out the traced pattern pieces. – Modern Sweatshirt
- Cut out the traced pattern pieces from the fabric with a pair of sharp scissors. You can cut all layers at once, or you can cut each layer separately for ease in sewing later on. It’s up to you!
- Cut out your sleeves by cutting off one long edge of each sleeve piece along its length and then slicing along the line marked “Cut” on your paper pattern piece (about ¼ inch above where it says “Cut”). Then cut from this new corner point down toward your original starting point (you should now be able to see that these two points make an angle when connected), stopping before reaching it so that there is enough room inside for your arm but not too much material hanging over onto itself.*Note: Be sure not to cut straight through any part of either side—just short enough so that when turned right-side out later, no raw edges are visible.*Next cut open these same two sides completely so they form two tubes instead of one big tube but still keeping them connected where they need t
Cut out sleeves for the hoodie.
- Cut out the sleeves. The sleeves should be wider than your hoodie fabric, so you need to add a piece of fabric that is at least 5 inches wide and twice as long as the length of your sleeve (a rectangle). Make sure that this rectangular piece is hemmed on all sides; you’ll use this hem in order to attach it to your sleeve later on.
- Sew together the pieces of fabric for each sleeve. Use a sewing machine or hand-sew them together with thread and needle until they form one large rectangular shape that is twice as long as your hoodie sleeve and about five inches wider than it. This will ensure that there are no gaps between these two pieces when you put them together later on!
- Pin both of these pieces onto one another so that they form one complete circle around the edge or “hem” from before until they meet neatly at their top corners, leaving enough space between them at their bottom corners so that you can sew those together too when needed later on without needing any extra material there either!
Add cuffs and hem to the sleeves.
Adding cuffs to the sleeves and hems to the edges of the hoodie will take your simple hoodie from being an ordinary piece of clothing to a modern style statement.
- To add cuffs, cut two strips of fabric that are 2 inches wide and long enough to go around each sleeve. Fold the strips in half lengthwise, press, then sew them together on one long edge using a straight stitch or zigzag stitch if you prefer. Press open and turn right side out so they look like tubes with one seam down each side.
- Pin each cuff over your sleeve opening, right sides together and then sew all around using a ¼ inch seam allowance (1/4 inch = 6 mm). Use either a straight stitch or zigzag stitch here as well! Press seams open flat against your body so that when you slip them on they aren’t too bulky in the arm area! Then fold under raw edges 1/4 inch toward wrong side twice leaving hemming stitches showing at top edge only – no need for hemming here since we pressed earlier so all our raw edges have already been folded under once before hand sewing started 🙂 … And there you have it: Cuffed Sleeves!!!
Stitch the bottom hem – Trendy Hooded Pullover
- Sew the hem by hand or machine. You can choose to do this yourself, or have it done at a local tailor. If you do not own a sewing machine, check with your local community college—they may offer free classes on how to use one!
- Choose your thread color carefully: Most hoodies come in black, navy blue, grey and white; so make sure that you pick something that will stand out against those colors! Try using contrasting thread colors like red versus navy blue; yellow versus grey; etcetera!
- Stitch the bottom hem with straight stitches around 1/4 inch apart from each other (you could also use zigzag). The longer they are spaced apart from each other—the more dramatic effect on your look will be when wearing this new style statement piece!”
It’s easy to make a stylish hoodie if you have some basic sewing skills.
It’s easy to make a stylish hoodie if you have some basic sewing skills. The first step is to cut out the pattern pieces, which are the front and back of your hoodie, with two sleeves and a band that goes around your waist. Next, sew them together at their edges using straight stitches with a narrow seam allowance. Then turn it inside out and iron it flat with an ironing board cover on top for protection so there are no marks left behind on your fabric when pressing down hard to flatten out any wrinkles in your seams after sewing them together.
Next step: cut along each side seam so that you have one long piece made up from all four pieces (two front panels plus two back panels). Fold down these raw edges twice over so they’re hemmed now, too! Finally pull open this seam until it’s wide enough for something else we’re going put inside later—now let’s move onto Step 4!
Conclusion
You can try so many different styles of hoodies, and they’re all easy to make! I hope this tutorial was helpful and that you’re now ready to create your own custom hoodie.


Leave a Reply
You must be logged in to post a comment.